µSCOOTER Pro™ supports importing clients from a file generated by a third party program such as Microsoft Excel® or an equivalent. The import file must be in a comma separated value (CSV) file. SCOOTER's Import Wizard takes you step-by-step through the import process.
To start the Import Wizard, go to the main menu and select Tools > Import Clients.
Selecting the Source File

Selecting a File to Import
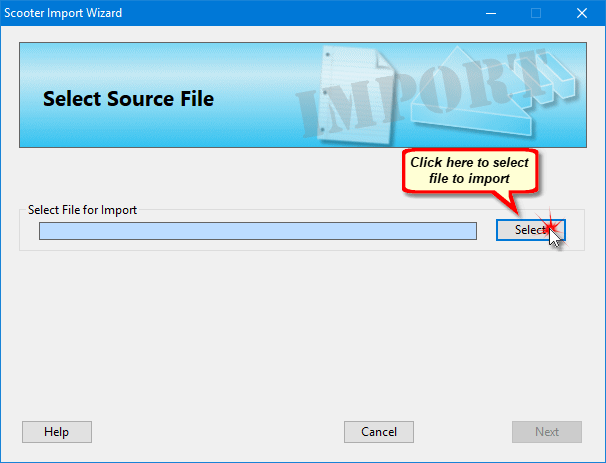
The initial window of the Import Wizard needs to know the name of the client file you want to import. Click the Select button to open a standard Windows file selection dialog. Navigate to the directory containing the desired file, then select the file by left clicking it with the mouse, then click Open. Once the file has been selected, click the Next button on the wizard to move to the next step.
Selecting or Creating an Import Template

Selecting an Import Template
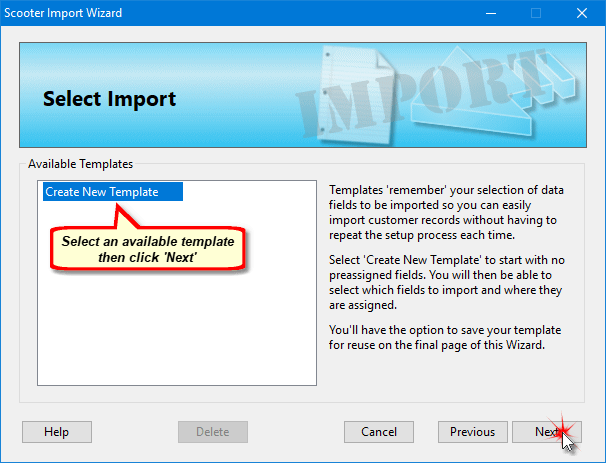
The Import Wizard uses templates to determine which parts of the imported client information go where. Templates are necessary because the information in the import file might not be in the same order that SCOOTER expects. Using a template allows you to link each import field with SCOOTER's database fields to overcome this problem. Additionally, each template can be saved for reuse for later imports using the same file structure.
Initially, you will not have any saved templates. In order to continue with the import, select Create New Template from the Available Templates list, then click the Next button to continue.

Assigning Import Fields
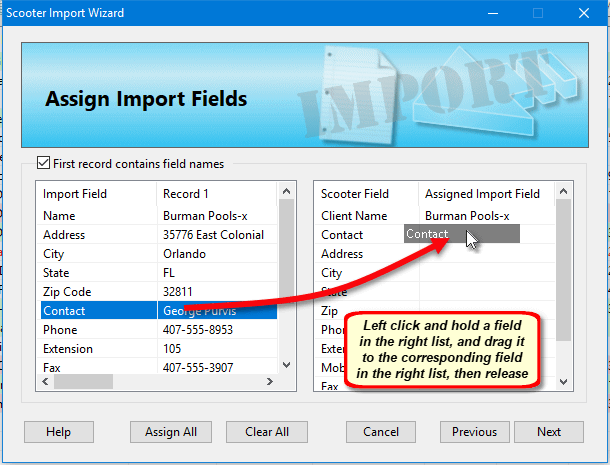
The next wizard window displays the first several records of the file being imported on the left and the available SCOOTER fields on the right. Each column in the left list is a record in the file, with each row one field in the parts of that record (such as the client name, address, city, state, etc.) If the import file includes field names — labels identifying the content of the fields — they will be shown as the first column of the left list. Use the scroll bar at the bottom of the left list to view additional records.
It's very possible the file being imported will either not have the same field names or have a different order (or both). In the example image above, the Contact field on the left side is the 6th item in the list, while in SCOOTER's fields on the right, it is field number 2. There are two ways to deal with this issue.
If the file being imported contains field names, click the Assign All button to have SCOOTER Pro™ attempt to intelligently match up the import fields with SCOOTER's fields. Any unrecognized fields will be skipped. If field names are not present, clicking the Assign All button will assign fields on a one-to-one basis starting with the first field. In either case always inspect the results to ensure the assignments are correct, manually modifying them as needed.
Instead of using Assign All, each field can be manually assigned. Use the mouse to left click and hold on a field in the left list, then drag and drop it on the desired destination field in the right list. If you make a mistake, use the left mouse button to double click the field in the right list to remove the assignment.
The Client Name field is a mandatory assignment; the wizard cannot proceed if this field remains blank. All other fields are optional and any that are not assigned will be ignored during import.
If the First record contains field names box is checked, the first record of the file — which contains those names — will not be imported.
Once all field assignments are complete, click Next to continue.

Completing the Import
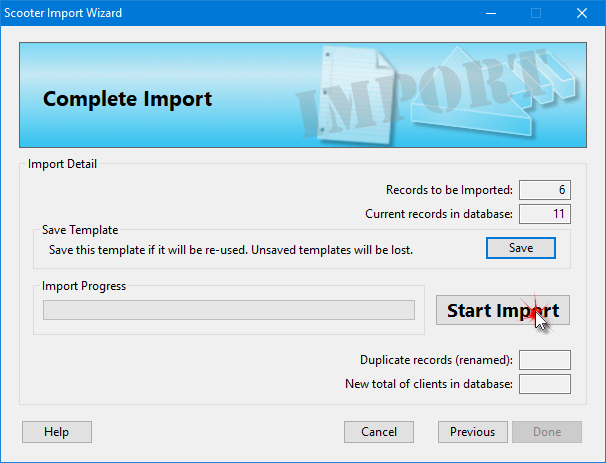
The final window of the Import Wizard provides details of the import and the results after the import is complete. Click Start Import to begin the process.
If a record being imported has the identical client name as an existing client, the imported record will be renamed with a number suffix (e.g., "Bob's Auto" becomes "Bob's Auto1").
If the template used for the import will be reused for future imports, click Save to open the Save Template window. See the topic Saving Templates.
Once the import is complete, click Done to close the Import Wizard.