µSCOOTER Pro™ allows you to export clients and selected data fields of those clients using SCOOTER Pro™'s Export Wizard. The wizard walks you through the steps to export the client data to a comma separated value (.CSV) file that can be read by third party programs such as Microsoft Excel® and many others. This can be beneficial in compiling mailing lists or information for other uses.
Open the Export Wizard by selecting Tools > Export Clients from the program's main menu. The default is to export all clients. In order to export selected clients, you must first switch to SCOOTER Pro™'s split window view to select those clients you want to export.
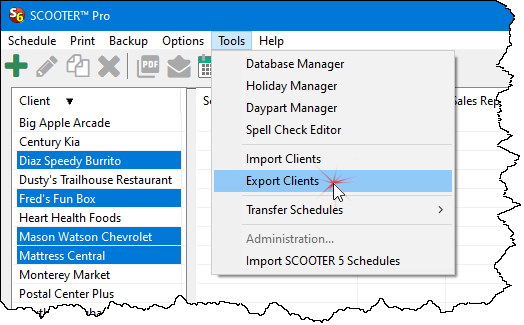
Selecting Clients for Export
If no clients are selected, or he Export Wizard is launched from the standard view window, the option to export selected clients is disabled.
Selecting an Export Template
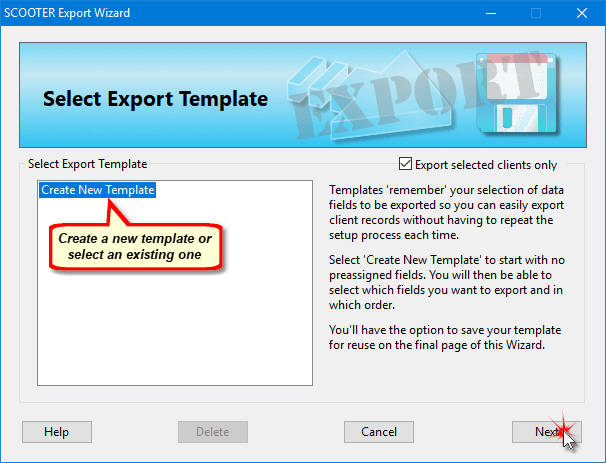
Selecting an Export Template
The Export Wizard uses templates to determine which fields of the client record are to be exported. Templates are necessary to allow the fields as they appear in SCOOTER to be rearranged to suit the needs of whatever third party software will be used. Additionally, the resulting template may be saved for reuse in future exports.
Initially, you will not have any saved templates. Use the mouse to select Create New Template from the Select Export Template list, then click Next to continue.
Select and Rename Fields to Export
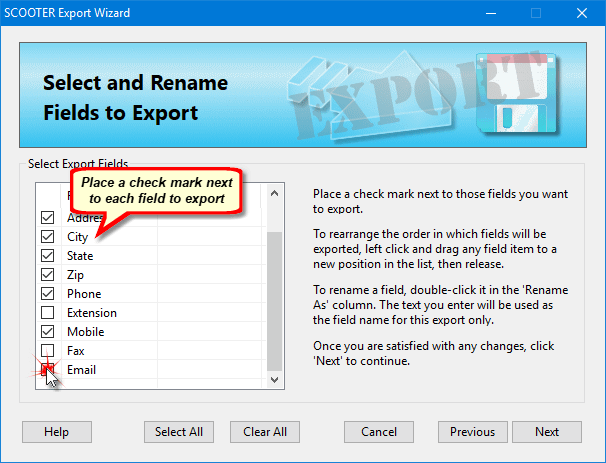
Selecting Fields to Export
This window of the Export Wizard offers several options. First, use the left button of your mouse to place a check mark next to each field to be exported. To speed up the process, use the Select All and Clear All buttons to place and remove check marks from all fields, respectively.
To change the order in which export fields appear, left click and drag any item to a new position in the list and release.
The field name of any field can be modified by double-clicking the Rename As column for that item and entering a new field name. Any fields not renamed will use the default field name.
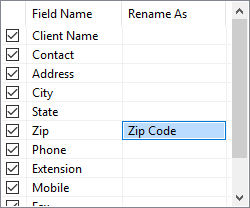
Renaming an Export Field
Once all field changes are complete, click Next to continue.
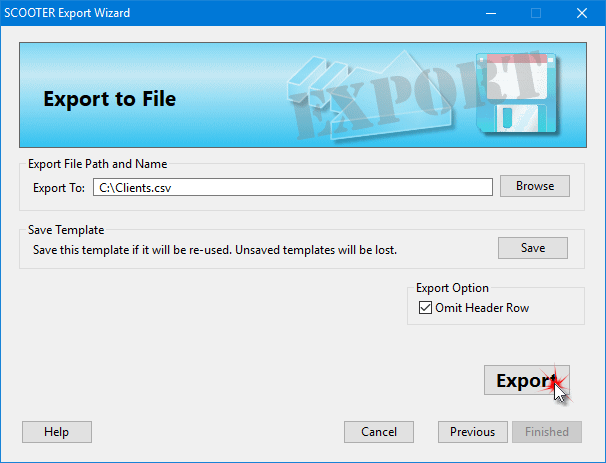
Completing the Export
To complete the export, click the Browse button to select the directory to receive the export file as well as entering a name under which the file will be saved. If you fail to enter a file suffix, SCOOTER will add the .CSV designation for you.
If you wish to save the export template you've created for later reuse, click Save and use the Save Template dialog to specify a name under which the template will be saved. See the topic Saving Templates for more information.
If you do not wish to include the field names (header row) as part of the export file, place a check mark in the box labeled Omit Header Row.
Click the Export button to export the fields to the designated file. Once the export is complete, click Finished to close the Export Wizard.